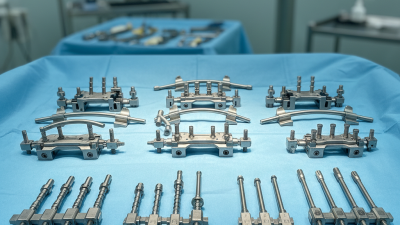
Choosing equipment for Minimally invasive spine surgery is not simply a matter of selecting the smallest instruments. The right system should support clear visualization, controlled access, and reliable handling while fitting the procedure and the surgical team’s experience. A narrow working channel, for example, can limit tissue disruption, but it also demands compatible instruments and a dependable view of the operative field. Small details matter.
A practical evaluation starts with the planned procedure, patient anatomy, and the facility’s existing imaging and operating-room setup. Surgeons and clinical teams should assess instrument ergonomics, scope clarity, access-system stability, sterilization requirements, maintenance, and training needs. Ask how equipment performs during realistic cases, not only during a polished demonstration. Manufacturer specifications and published evidence can inform decisions, but they do not replace hands-on assessment or professional judgment.
Compatibility deserves particular attention. Instruments that appear similar may not work well together, and adding unfamiliar equipment can complicate established workflows. Consider availability of technical support, replacement components, and clear instructions for use. These factors affect readiness as much as the device itself. A perfect system on paper is not always the best fit in practice. Selection should reflect the procedure, local protocols, and the experience of the clinicians who will use the equipment. No checklist removes every uncertainty; careful review, appropriate training, and ongoing evaluation help teams make a more informed choice.
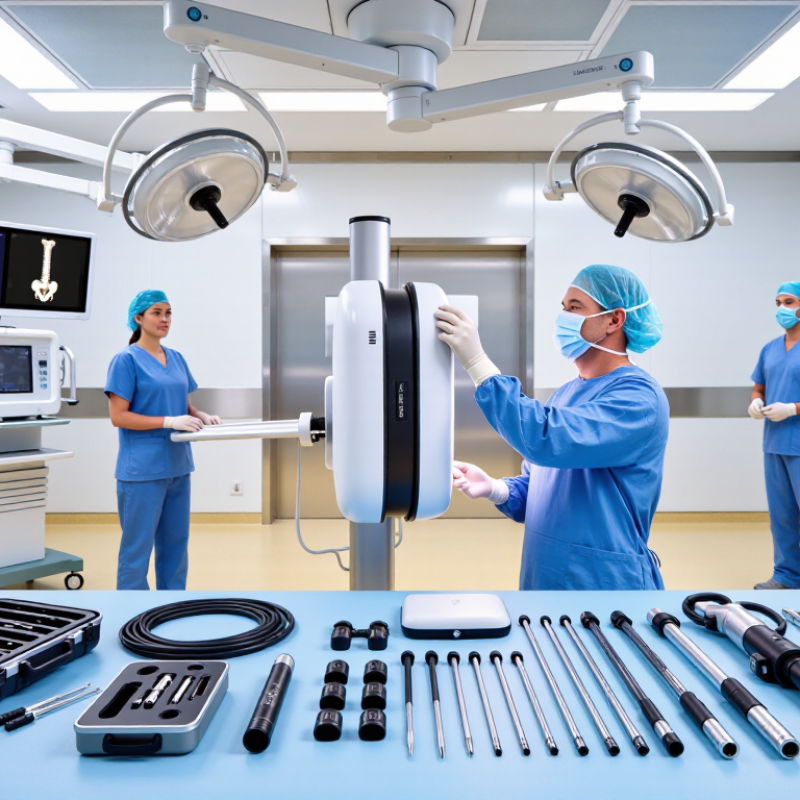
Before comparing minimally invasive spine surgery equipment, define the exact procedure. A single-level decompression has different needs from a multilevel fusion. Specify the spinal level, surgical approach, planned access corridor, and whether fixation is required. These details shape choices such as retractor depth, instrument length, and imaging access.
Translate the plan into clinical requirements with the operating team. Consider patient anatomy, positioning, available imaging, and the steps where instruments must pass through a narrow working channel. Check that the equipment supports clear visualization and practical instrument exchange without obstructing the surgical field. Confirm compatibility across components, along with cleaning, sterilization, and maintenance requirements. Small workflow mismatches can matter. A handle that feels comfortable at a workstation may be awkward beside a draped patient; testing the setup in a realistic simulation can reveal this. Not every need is obvious on paper.
Tips: Map each procedural step to the equipment it requires. Ask surgeons, nurses, and sterile-processing staff to review the list. Record unresolved concerns rather than assuming they will disappear during surgery.
This comparison maps common equipment needs to the procedure’s core steps: visualization and access for all three, tissue decompression for discectomy and decompression, and implant placement for fusion. Treat it as a planning checklist—not a universal protocol—and confirm requirements with the surgeon, facility, and patient-specific plan.
Choosing equipment starts with the planned route, not a catalog. For a tubular decompression, the team may need sequential dilators, a tubular retractor, fine instruments, and magnification from a microscope or endoscope. The working channel must suit the target level and the surgeon’s technique. A narrow tube can limit instrument movement. That matters.
Endoscopic procedures require a compatible scope, camera, light source, irrigation system, and instruments sized for the working channel. The approach also shapes imaging needs. Fluoroscopy can help confirm level and instrument position; some cases may use navigation. Keep image quality clear, and agree on radiation-reduction steps before the procedure. Small details are easy to overlook.
For lateral access, equipment may include a retractor system and neuromonitoring to help identify nearby nerves. Percutaneous fixation calls for guidewires, cannulated instruments, and suitable imaging for screw placement. These lists are starting points, not prescriptions. Anatomy, diagnosis, surgeon training, and facility protocols affect selection. I would also check that instruments fit together, are available in the required sizes, and have sterile backups. Compatibility sounds mundane. It can become a problem mid-case. A qualified spine team should confirm the final setup for each patient and approach.
| Surgical Approach | Typical Indications | Core Equipment | Imaging and Access | Key Selection Considerations |
|---|---|---|---|---|
| Microdiscectomy | Lumbar disc herniation causing nerve-root compression, when nonoperative care has not provided adequate relief. | Operating microscope or surgical loupes; fine nerve-root retractors; pituitary rongeurs; curettes; bipolar cautery; suction-irrigation. | Radiolucent table and intraoperative fluoroscopy for level confirmation; tubular retractor may be used for a muscle-splitting approach. | Choose optics with adequate magnification and illumination. Confirm that instruments fit the planned exposure and allow controlled work around neural structures. |
| Tubular decompression or laminotomy | Selected cases of lumbar spinal stenosis or focal nerve-root compression requiring decompression. | Sequential dilators; tubular retractor with adjustable holding arm; endoscope or microscope; Kerrison punches; drills and burrs; fine dissectors. | Fluoroscopy is commonly used to confirm the target level and guide docking. Endoscopic systems require a compatible camera, light source, and display. | Match tube diameter and working length to anatomy and instruments. Ensure stable retractor positioning, adequate visualization, and compatibility between the scope and tools. |
| Transforaminal endoscopic discectomy | Selected lumbar disc herniations accessible through a transforaminal route; suitability depends on anatomy and surgeon assessment. | Endoscope with working channel; compatible endoscopic forceps and graspers; radiofrequency probe where used; irrigation tubing and pump; guidewires and access cannulas. | Fluoroscopy is typically used for trajectory and instrument-position guidance. A high-definition camera, light source, monitor, and irrigation system are required. | Verify working-channel diameter, instrument compatibility, irrigation control, and image quality. Plan for radiation protection and a reliable method to manage bleeding and visibility. |
| Oblique lateral interbody fusion | Selected lumbar degenerative conditions for which an anterior-to-psoas interbody approach is appropriate. | Access and dilation instruments; retractor system; disc preparation instruments; trial implants; interbody implants; insertion tools; standard fixation instruments as indicated. | Fluoroscopy is used for level, trajectory, and implant-position checks. Neuromonitoring may be used to help assess proximity to neural structures. | Equipment should support controlled access and clear visualization. Consider patient anatomy, implant sizing, retractor stability, and the team’s neuromonitoring workflow. |
| Transforaminal lumbar interbody fusion | Selected lumbar conditions requiring decompression and interbody fusion, such as degenerative instability or recurrent disc disease. | Tubular or limited-access retractor; microscope or endoscope; bone-cutting instruments; disc preparation tools; trial spacers; cage inserter; pedicle-screw instrumentation when indicated. | Fluoroscopy supports level confirmation, screw placement, and assessment of implant position. Navigation may be used where available and appropriate. | Confirm that retractors, implant inserters, and instruments work together within the planned exposure. Select imaging and navigation workflows suited to the procedure and facility. |
| Percutaneous pedicle-screw fixation | Stabilization for selected fractures, deformity, or fusion procedures when percutaneous fixation is appropriate. | Guidewires; cannulated access instruments; taps; screwdrivers; percutaneous screws and rods; rod-reduction instruments; torque-limiting tools. | Biplanar fluoroscopy or three-dimensional navigation may guide screw trajectories and implant placement. Confirm imaging equipment compatibility with the operating table. | Prioritize accurate trajectory guidance, secure guidewire control, and compatibility among screws, rods, and drivers. Use radiation-safety measures and verify final implant position. |
| All approaches | Equipment planning should be individualized to the diagnosis, anatomy, procedure, and surgeon’s training. | Standard sterile instruments; suction and irrigation; electrosurgical equipment; emergency conversion instruments; equipment for anesthesia and patient positioning. | Confirm access to the required fluoroscopy, endoscopy, microscopy, or navigation systems before the procedure. | Equipment selection does not replace clinical judgment. Follow institutional protocols, device instructions, radiation-safety requirements, and applicable training standards. |
How to Choose Minimally Invasive Spine Surgery Equipment?
Assess imaging, instrument, and system compatibility before comparing price or features. The imaging chain should match the procedure, patient anatomy, and operating-room layout. Confirm DICOM export, image latency, field of view, and radiation-dose tracking. The World Health Organization reports that one in ten patients experiences harm in healthcare, while more than half of this harm is preventable. Clear imaging workflows can reduce avoidable positioning and identification errors.
Check whether instruments pass smoothly through the planned working channel. Small mismatches matter. Measure shaft diameter, angulation, length, and locking mechanisms using actual trial setups. The scope, light source, camera, navigation unit, and display should communicate reliably. IEC 60601-1 compliance supports electrical safety, but certification alone does not prove practical compatibility. A system may pass testing and still create awkward cable routing or poor visualization.
Sterilization is another compatibility test. Verify material tolerance, disassembly steps, tracking requirements, and validated reprocessing instructions. FDA guidance emphasizes that reusable devices require controlled cleaning and reprocessing procedures. Ask clinical engineers to test the complete setup, not isolated components. A spreadsheet helps, but it can miss hand clearance, glare, or a delayed image. That uncomfortable gap deserves attention. Record failures during simulation, revise the equipment list, and involve surgeons, nurses, radiographers, and biomedical engineers before procurement.
When comparing minimally invasive spine surgery equipment, safety should be judged in the full operating-room workflow, not from a feature list alone. Check that instruments provide stable control and a clear view through the planned access route. Confirm compatibility with imaging, positioning systems, and the other tools used by the surgical team. Small details matter. A handle that slips in a gloved hand or a display that is hard to read can add friction at a critical moment. Review cleaning and sterilization instructions, too, and verify them against the facility’s established processes.
Ergonomics affects more than comfort. A well-balanced instrument may reduce awkward wrist angles during repeated movements, while accessible controls can help clinicians keep their attention on the field. Evaluate the equipment in a realistic setup, including room layout, lighting, and the team’s usual workflow. Ask staff who will handle, prepare, and reprocess each item; their observations may reveal problems a demonstration misses. Not always. A device that feels intuitive to one user may not suit another, so training and hands-on assessment deserve time. Compare setup steps, grip, visibility, and the effort needed to adjust or exchange instruments. Document trade-offs, and check instructions for use and local protocols before adoption.
A compact instrument set is not automatically the economical choice. Ask how surgeons and operating-room staff will train on each component, including positioning, imaging, and instrument exchange. Published learning-curve studies of minimally invasive spine procedures show that operative efficiency develops over repeated cases; the reported timelines vary with procedure and surgeon experience. Request hands-on training, clear competency steps, and follow-up support after initial cases. A demo day alone may not be enough.
Support has real financial consequences. Confirm service response times, loaner availability, repair coverage, and the process for replacing damaged instruments. A 2018 JAMA Surgery analysis estimated operating-room costs at about $36–$37 per minute in academic hospitals, with reported costs ranging from $22 to $133. Even a short delay can therefore matter, though the estimate should not be treated as a universal local rate. Ask the vendor to document expected service intervals and consumable needs.
Compare lifecycle costs over several years, not just the purchase quote. Include sterilization time, single-use items, upgrades, staff training, maintenance, and any imaging or table requirements. Build a simple cost-per-case model using your own case volume and reprocessing data. It will be imperfect. That is useful. Mark uncertain assumptions, then revisit them after early cases.
Cite: Childers and Maggard-Gibbons, JAMA Surgery, 2018; peer-reviewed MIS spine learning-curve studies.